
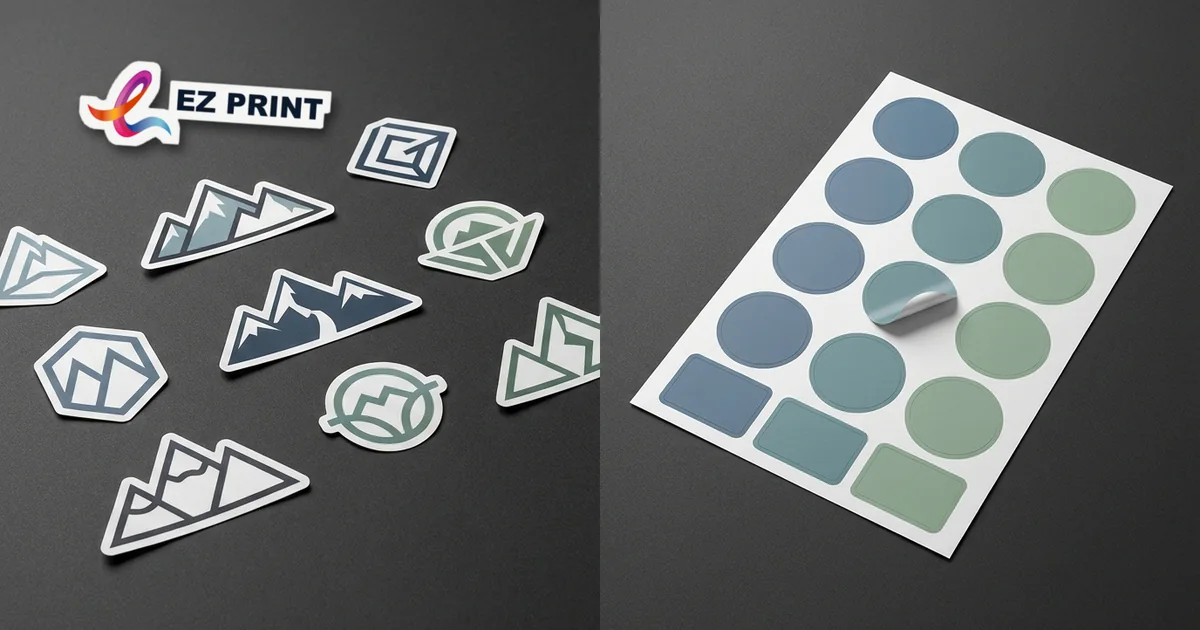
Die-cut and kiss-cut describe how deep the blade goes. A kiss cut goes through the sticker face and adhesive but not the liner, so the stickers peel off a backing sheet that stays in one piece; a die cut goes all the way through, so each sticker is a separate piece cut to its own shape. Choose kiss-cut sheets for sets and packs, and die-cut singles for stickers handed out one at a time.
What is the difference between a die-cut and a kiss-cut sticker?
A sticker is three layers: a printed face, an adhesive and a liner. Kiss-cut means the blade goes through the face and the adhesive but not the liner, so the label peels off a sheet that stays in one piece. Die-cut goes all the way through, giving individual stickers with no surrounding sheet. The difference is only the depth of the cut.
A third method, contour cutting, describes the shape rather than the depth: the blade follows any closed vector path rather than a die shape. Like a die, a stored contour path is kept on file with the approved artwork. In every case the label is printed, laminated and then cut, in that order, because the cutter has to go through the laminate rather than under it.
| Kiss-cut | Die-cut | |
|---|---|---|
| How deep the blade goes | Through the face and adhesive, not the liner | All the way through |
| What you receive | Stickers on a backing sheet that stays whole | Individual stickers with no surrounding sheet |
| Supply | A4 or A3 sheets, or rolls | Loose singles |
| Handled by hand in quantity | Easier | Each piece handled separately |
| Best for | Sets, packs, product labels on a roll | A single giveaway, logo stickers, packaging seals |
| Tooling | Die or contour path, kept on file | Die or contour path, kept on file |
| Lead time | Standard 7–14 working days | Standard 7–14 working days |
When should you order die-cut singles instead of kiss-cut sticker sheets?
Order die-cut singles when each sticker is handed out on its own and the shape is the point, such as a logo sticker or a packaging seal. Order kiss-cut sheets when several stickers belong together or need to be handled in quantity, because the backing keeps them as one item. Kiss-cut is easier to handle in quantity; die-cut looks better as a single giveaway.
Die-cut singles are cut to the outline of the artwork, for logos, packaging seals and giveaways. Because there is no sheet around them, the outline of the sticker is the outline of the design, and a recipient gets one finished object rather than a sticker still on a carrier.
Kiss-cut sticker sheets carry several stickers on one backing sheet, so each peels off on its own. Multiple labels sit on an A4 or A3 backing sheet and are peeled by hand. The sheet keeps a set together until each sticker is used.
Labels on a roll are kiss-cut too, but wound onto a 40 mm or 76 mm core with a stated unwind direction, for applicator use. If the labels are going onto products by machine, the roll is the format, not the sheet. Our guide to roll labels versus sheet labels covers that choice.
EZ Print’s print catalogue also lists a combined “Kiss-cut + Die-cut Option” for label stickers, die-cut versions of transparent, simili (uncoated paper) and metalized foil stickers, and an “Easy Peel Die Cut” finish. Describe what the sticker is for and how it will be handed out, and the cut is specified against it.
How does the cutting die work, and when do you need a new one?
A die is a length of steel rule bent to the outline, set into a forme and pressed through the material. A standard rectangle, rounded rectangle, circle or oval uses a die already held at common sizes. Any other closed outline needs a new die, which is cut once, kept on file with the approved artwork, and used again on the reorder.
That is the practical reason to settle the shape before the first run. A repeat order of the same label skips the tooling entirely, which on a shaped label is the largest single piece of work in the first run. Each new outline, by contrast, is a new tool, so a shape that changes between reruns starts from scratch every time.
The die also sets limits on the drawing:
- Internal corners come back radiused. Steel rule bends to a radius rather than to a point, so every internal corner arrives with a curve in it. Draw internal corners at a 2 mm minimum radius on purpose rather than leaving the cutter to decide.
- Thin spikes and islands fail. Anything narrower than about 2 mm is fragile in the tool and fragile in the finished piece; thin spikes and islands either tear off or refuse to strip out of the waste.
- Contour paths are tooling too. A contour path is stored and reused in the same way as a die.
How should you prepare cut-line artwork for die-cut and kiss-cut stickers?
A sticker file has two artworks in it: what is printed, and where it is cut. The cut path drives a blade, so it must be a closed vector on its own layer, not a drawn outline, not a rasterised edge, and not implied by the shape of the design. Supply PDF/X-4 or Illustrator with the cut path intact as a vector.
- CUT layer. Draw a single closed path on a layer named CUT, in a spot colour, never printed.
- Bleed. Extend the artwork 2 mm outside the cut path on every edge, so a small shift in cutting does not show an unprinted edge.
- Safe margin. Keep text and logos 3 mm inside the cut path. Cutting tolerance on a small label is around half a millimetre.
- Internal corners. Use a 2 mm minimum radius. A blade cannot turn a sharper corner without tearing the face.
- One sticker per artboard. Supply one label per artboard, not a sheet of them. The step-and-repeat is worked out against the die.
- Size. Stickers run from about 15 × 15 mm to a full A3 sheet. Larger shapes run as vinyl graphics.
For file preparation in general, see how to prepare artwork for print.
Decision checklist: die-cut singles or kiss-cut sticker sheets?
Decide the cut by how the stickers will be handed out and applied, then confirm the face, the adhesive and the laminate against the surface. A sticker given away on its own points to die-cut; a set, a pack or a product label applied by hand from a sheet points to kiss-cut; labels applied by machine point to a roll. Run through these checks before the artwork is final.
- How it is handed out. One at a time, or as a set on a sheet?
- How it is applied. By hand from a sheet, or by machine from a roll?
- The shape. A standard rectangle, circle or oval on a held die, or a custom outline that needs a new die kept on file?
- The face. Paper for indoor and short-life use; vinyl or synthetic film where it must survive moisture, refrigeration or handling.
- The adhesive. Permanent for a product, removable for a promotion, low-tack where a surface must be left unmarked.
- The laminate. Matt, gloss or soft-touch. A matt laminate takes a marker pen.
- The date. Standard turnaround is 7–14 working days, on a die held or a die cut for the first time. Express is quoted per job.
What mistakes should you avoid when ordering cut stickers?
Most cut-sticker problems come from the cut path, not the print: a cut line drawn on the artwork layer, artwork that stops at the cut line, sharp internal corners, and shapes too thin to survive peeling. Choosing the wrong face or adhesive for the surface is the other common cause, and each of these is a reprint rather than a repair.
- The cut line on the artwork layer. A drawn outline is printed, not cut. Put the cut path on its own CUT layer.
- No bleed. Without 2 mm of artwork outside the cut path, a small shift shows a white edge.
- A sharp internal corner. A die-cut shape with a sharp internal corner under about 2 mm radius tears when the label is peeled.
- Paper in a wet place. Paper wicks water at the cut edge, the print lifts and the corners curl.
- A permanent adhesive on a temporary job. It can remove the paint or leave a residue outline that is worse than the sticker.
Worked example: ordering kiss-cut sticker sheets for an event welcome pack
Hypothetical planning example. Actual production timing, paper availability, and logistics are confirmed individually upon artwork and specification review. An organiser wants a sheet of branded stickers in each delegate welcome pack, so the stickers stay together in the bag and each one can be peeled off and used separately. Here is how the specification is built.
- Quantity and format: 1,000 sticker sheets, A4, each carrying 8 different stickers.
- Cut: Kiss-cut through the face and adhesive, so the A4 backing stays whole and holds the set together.
- Face and laminate: White vinyl face, which prints densely and takes a laminate well, with a gloss laminate because unlaminated vinyl scuffs under a fingernail.
- Adhesive: Chosen against the surfaces the stickers are expected to go on: permanent where they should stay, removable where they must come off without a residue.
- File: One sticker per artboard, each with its own closed path on the CUT layer, 2 mm bleed outside it and 3 mm safe margin inside it, internal corners at 2 mm minimum radius.
- Timing: Standard 7–14 working days. The contour path is kept on file, so a second print run for the next event does not wait for tooling.
Frequently asked questions about die-cut and kiss-cut sticker printing in Singapore
What is the difference between kiss-cut and die-cut stickers?
Kiss-cut goes through the face and the adhesive but not the liner, so the stickers peel off a backing sheet that stays whole. Die-cut goes all the way through, giving individual stickers with no surrounding sheet.
Which is better for a giveaway, die-cut or kiss-cut?
Kiss-cut is easier to handle in quantity; die-cut looks better as a single giveaway. A sheet of several kiss-cut stickers suits a pack or a set, and a die-cut single suits a sticker handed out on its own.
What sheet sizes are kiss-cut sticker sheets printed on?
Kiss-cut stickers are supplied on A4 or A3 backing sheets and peeled by hand. For machine application, labels are supplied on rolls instead, wound onto a 40 mm or 76 mm core with a stated unwind direction.
How should the cut line be supplied?
As a single closed vector path on a layer named CUT, in a spot colour, never printed. Add 2 mm of artwork outside the cut path, keep text 3 mm inside it, and radius internal corners to at least 2 mm.
Do I pay for the cutting die again on a reorder?
No. A cutting die or contour path is made once and kept on file with the approved artwork, so a repeat order of the same shape does not wait for tooling again and does not pay for it again.
Print die-cut stickers and kiss-cut sheets with EZ Print
EZ Print prints stickers and product labels in Singapore, and has done since 2017, kiss-cut on sheets or rolls or die-cut through to a free shape, with the die or contour path kept on file for the reorder. See faces, adhesives and cuts on the sticker and label printing page, and the packaging printing page for the boxes the seals go on.
For choosing the face and adhesive, read custom sticker and label printing in Singapore. When the shape, quantity and format are settled, request a quote; EZ Print quotes from the specification and confirms the production schedule in the quotation.
Same-day and urgent printing available. Subject to artwork approval, payment, print type and production availability. Timing confirmed per job.