

The same product label can arrive in two quite different forms: flat on a sheet, ready to peel by hand, or wound on a roll, ready for a dispenser or an applicator machine. The artwork may be identical, but the order is not. A roll that does not fit the machine, or that unwinds with the labels upside down, cannot be used as it is, and a box of sheets is slow work for a team labelling hundreds of jars.
This guide is about that format decision. It explains when sheets make sense, when rolls are needed, which roll details an applicator depends on, how unwind directions are described and how to set up artwork for each. For choosing the label material itself, see the guide to choosing label stock for bottles and packaging, and for the full range of faces and finishes, the stickers and labels page.
What is the practical difference between roll labels and sheet labels?
Sheet labels are kiss-cut on a flat backing sheet, so each label peels off while the sheet stays whole. Roll labels are kiss-cut on a continuous strip of backing that is wound onto a cardboard core. The print, material and finish can be the same; the difference is how the labels are supplied, stored and applied.
| Sheet labels | Roll labels | |
|---|---|---|
| How they are supplied | Flat sheets, A4 or A3 | Wound on a core, one or more labels across the strip |
| How they are applied | Peeled and placed by hand | By applicator machine, hand-held dispenser or by hand off the roll |
| Mixing designs | Several designs or sizes can share one sheet | Usually one design per roll, or a stated sequence |
| Counting | Labels per sheet × sheets | Labels per roll × rolls |
| Storage | Flat, in a box or folder | Upright or on a spindle, protected from crushing |
| What must be specified | Sheet size and layout | Core, roll size, unwind direction, orientation, gap |
The stickers and labels page lists both: kiss-cut on A4 or A3 sheets, or on rolls with a stated core and unwind direction.
When are sheet labels the better choice?
Sheet labels suit hand application in modest numbers, small batches with several designs, and labels handed to other people to apply. They need no equipment, they are easy to count and share out, and a single sheet can carry different flavours, sizes or versions. If nobody will use a dispenser or machine, sheets are usually simpler.
Typical situations:
- Small-batch products. A bakery, café or skincare brand labelling jars by hand at a packing table can work straight from sheets.
- Several versions together. A sheet can carry a front label, a back label and a seal, or six flavour variants, so the packer has everything for one product in one place.
- Labels given out. Event stickers, giveaway sheets and labels sent to branches are easier to post and share as flat sheets.
- Labels written on later. Batch or date labels on a writable face are often filled in at the bench, which is easier on a flat sheet.
Sheets have limits. Peeling labels one at a time is slow for large quantities, and very small labels can be fiddly to lift from a sheet. If the team is applying labels all day, a roll with a dispenser is often easier on hands and time.
When do product labels need to be on a roll?
Labels need to be on a roll when they go through an applicator machine or a dispenser, and rolls are often easier when staff apply large numbers by hand. The machine pulls the backing strip around a peel edge so each label lifts off on its own, which only works with a continuous, correctly wound roll.
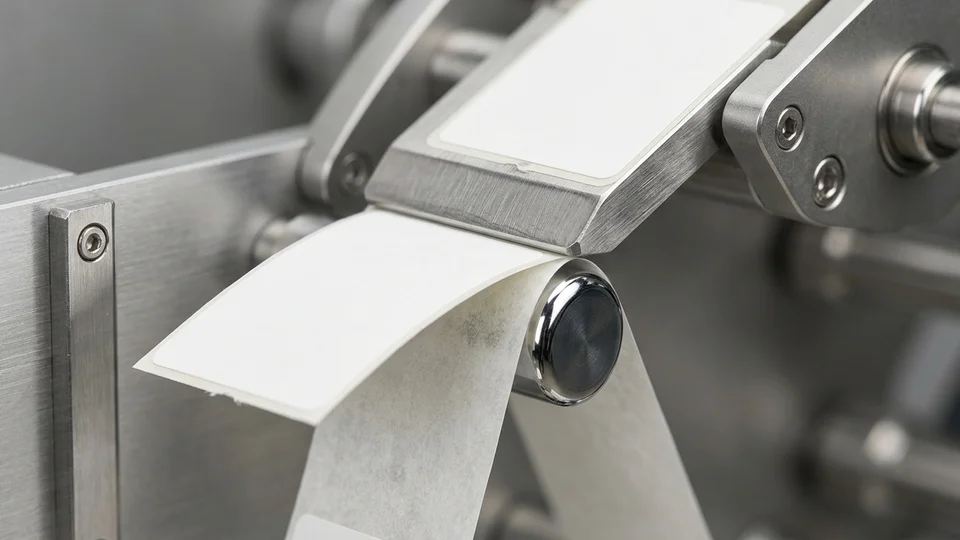
Rolls are the usual choice when:
- A machine applies the labels. Semi-automatic and automatic applicators take labels from a roll. Sheets cannot be loaded.
- A hand-held or table-top dispenser is used. A dispenser peels each label for the operator, which speeds up hand application.
- The quantity is large. Thousands of labels on a few rolls are easier to handle than hundreds of loose sheets.
- Labels feed a printer later. If labels will be overprinted with dates or codes on other equipment, that equipment will have its own roll requirements. Name the equipment so its requirements can be checked.
If you are not sure whether your team will move to a machine, say so in the brief. It is easier to plan rolls from the start than to rewind them later.
Which roll details does a label applicator need?
An applicator needs the roll to match its spindle, its housing and its feed. That means the core size, the maximum outer diameter or labels per roll, the number of labels across the strip, the gap between labels, the unwind direction and the label orientation. Take these from the machine’s manual or its operator, not from memory.
| Roll detail | What it means | Where to find it |
|---|---|---|
| Core size | The inside diameter of the cardboard core that slides onto the spindle | Machine manual or a measurement of the spindle |
| Maximum outer diameter | The largest roll the machine housing or arm can hold | Machine manual; or give labels per roll instead |
| Labels per roll | How many labels each roll carries | Your preference, within the outer diameter limit |
| Labels across | How many labels sit side by side on the strip | Usually one for applicators; ask if you need more |
| Gap between labels | The space between one label and the next along the strip | Machine manual, if the sensor needs a particular gap |
| Unwind direction | Wound out or wound in, and which edge leads | Machine manual or a photo of a working roll |
| Orientation | Which way up the artwork reads as the label comes off | A sketch, checked against the machine |
The stickers and labels page lists rolls on a 40 mm or 76 mm core with a stated unwind direction. If your equipment needs something different, give the requirement in the brief and ask whether it can be supplied.
A good shortcut: if you already have a roll that runs well on the machine, photograph it from the side and the end, measure the core and outer diameter, and send those with the quote request.
How do label unwind directions work?
Unwind direction describes how labels come off the roll. Labels can be wound with the printed face on the outside of the roll or the inside, and any of four edges can lead: top, bottom, left or right. That gives eight common positions. An applicator is set up for one of them, so the roll must match.
The usual convention groups the positions in two sets of four:
| Positions | Printed face | Leading edge |
|---|---|---|
| 1 to 4 | Wound out: labels face the outside of the roll | One position for each edge: top, bottom, left or right |
| 5 to 8 | Wound in: labels face the core | The same four leading edges, mirrored |
The numbering of the left and right positions differs between suppliers’ charts, which is why a number on its own can be misread. Three ways to avoid that:
- Use the machine’s own chart. Many applicator manuals show the required position as a drawing. Send that page.
- Describe it in words. For example: “wound out, top of the label leading off the roll”.
- Send a sketch or photo. A picture of a correctly loaded roll removes any doubt.
For hand application, the position matters much less, although a consistent direction still makes a dispenser easier to use. For a machine, a wrong position can mean labels go on upside down or sideways, and the roll may have to be rewound before it can be used.
How should label artwork be set up for sheets and rolls?
For both formats, supply one label at its finished size with bleed outside the cut line, a safe margin inside it, and the cut path as a separate vector line. The stickers and labels page asks for 2 mm bleed and a 3 mm safe margin. The format then adds a few details of its own.
For sheets:
- Say what goes on each sheet. One design repeated, or a mix of designs and sizes. If it is a mix, list the quantity of each.
- Give the sheet size. A4 or A3, if you have a preference.
- Keep labels apart. Allow space between labels so each one can be lifted cleanly. The layout on the sheet is usually arranged at prepress; send your artwork as single labels unless you need a fixed layout.
For rolls:
- One design per file. If several designs share a run, say how many of each and whether they should be on separate rolls.
- State the orientation. Mark the top of the label and how it should read as it comes off the roll, to match the unwind direction.
- Codes and small text. Barcodes and QR codes need clear space and good contrast, and they must sit inside the safe margin. The guide to printed labels with barcodes and QR codes covers the checks.
Food, cosmetic and other regulated labels carry wording that is the brand owner’s responsibility. EZ Print prints the artwork you approve and does not review regulatory content.
Does the format change the material or finish?
Usually not. Paper, white vinyl, clear film and synthetic faces can generally be supplied on sheets or on rolls, with the same choice of permanent or removable adhesive and matt, gloss or soft-touch lamination. Choose the material for the surface and conditions, then choose the format for how the labels will be applied.
Two links between the decisions are worth checking:
- Very small or very flexible labels. Some combinations of size, shape and material peel differently from a machine than from a sheet. If a label is tiny, thin or an unusual shape, mention how it will be applied.
- Labels for chilled or wet products. If labels go on cold or damp containers, the material and adhesive matter more than the format. Say whether containers are labelled before or after chilling.
The custom sticker and product label guide gives an overview of faces, adhesives and laminates.
Worked example: moving a sauce range from sheets to rolls
Hypothetical illustration. Figures are assumptions for explanation, not a real transaction or advice. A small food business has labelled its bottled sauces by hand from A4 sheets. It has bought a semi-automatic bottle labeller and needs its next order on rolls. The example follows the decisions in order, from the machine to the quote request.
Step 1: Read the machine’s requirements. The owner finds the labeller’s manual. It lists a 76 mm core, a maximum outer roll diameter, one label across, and a drawing showing labels wound out with the right-hand edge leading.
Step 2: Decide labels per roll. The business needs 3,000 front labels for three flavours. To keep rolls within the machine’s diameter limit and to keep flavours apart, it asks for 1,000 labels per roll, one flavour per roll.
Step 3: Keep the material. The sauces are stored at room temperature and wiped down before sale. The existing white vinyl face with permanent adhesive and matt lamination has worked well on sheets, so the material stays the same.
Step 4: Prepare the artwork. The designer supplies each flavour as a single label at finished size, with 2 mm bleed, the cut path on its own layer and the top of the label marked. The barcode sits inside the safe margin with its clear space intact.
Step 5: Send the brief. The owner sends the quote request with the label size, material, finish, quantity per flavour, labels per roll, the 76 mm core and a photo of the manual’s unwind drawing. Artwork, stock and capacity are confirmed against the specification, and timing is agreed when the job is confirmed.
Frequently Asked Questions
Should I order product labels on a roll or on sheets?
Order rolls if the labels go through an applicator or a hand-held dispenser, or if staff apply large numbers in one session. Order sheets if labels are peeled and applied by hand in modest numbers, or if you want several designs together on one sheet.
What roll details does a label applicator need?
Usually the core size, the maximum outer diameter or number of labels per roll, the unwind direction, the label orientation and the gap between labels. These come from the machine’s manual or the person who sets it up. Send them with the quote request rather than guessing.
What is an unwind direction?
It describes how labels come off the roll: whether the printed face is wound on the outside or the inside, and which edge of the label leads. There are eight common positions. Numbering conventions vary between suppliers, so a sketch or the applicator’s own chart avoids confusion.
Do roll labels and sheet labels use different materials?
Not necessarily. The same faces, such as paper, white vinyl, clear film and synthetic stock, can usually be supplied either way. The format is about how labels are supplied and applied; the material is chosen for the surface and conditions.
What should a label format brief include?
A label format brief should state sheets or rolls, then the details that format needs: sheet size and layout for sheets; core, labels per roll, labels across, gap, unwind direction and orientation for rolls. Add the label size, material, adhesive, finish, quantity per design and the required date, so the order can be checked once.
- Format chosen: sheets or rolls.
- For sheets: sheet size and the mix of designs per sheet.
- For rolls: core size, labels per roll, labels across, gap and unwind direction from the machine’s manual.
- Label size, material, adhesive and finish.
- Artwork as single labels with bleed, safe margin and a separate cut path.
- Quantity per design and the required date.
Standard turnaround is 7–14 working days. Same-day printing available. Subject to artwork, stock and production capacity confirmation. Timing is agreed for each job. To start, send your brief through the request a quote page.
Same-day printing available. Subject to artwork, stock and production capacity confirmation. Timing is agreed for each job.