

A presentation folder looks simple when it is closed: a cover, a back and something inside. Open it and the decisions show. How many pockets it has, how deep they are, whether there is a spine to take a thick document, how the pockets are held together and where a business card sits all affect how the folder works when it is handed across a table.
This guide covers those structural choices for a folder planned on the standard schedule. If you need folders at short notice, the guide to urgent presentation folder printing explains why a standard template is the safer route. The formats quoted are described on the presentation folders page.
What are the parts of a presentation folder?
A presentation folder is cut from one flat sheet of card, called the net, by a cutting die. The net is creased and folded into a front cover, a back cover, one or two pockets, and sometimes a spine. Glue flaps or locking tabs hold the pockets in place, and a card slit can be cut into a pocket.
The presentation folders page describes a standard A4 folder as about 220 × 307 mm when finished, cut from a flat net of roughly 460 × 320 mm. That is a little larger than the A4 sheet it holds, which under ISO 216 is 210 × 297 mm, so the documents slide in without catching.
| Part | What it does | Decision to make |
|---|---|---|
| Front cover | Carries the main design | Artwork, finish and any foil or spot UV |
| Back cover | Often carries contact details | Artwork and finish |
| Spine | The fold between covers | Flat crease, or a gusset for thicker contents |
| Pockets | Hold the documents | One or two, depth, shape |
| Glue flaps or tabs | Hold the pockets closed at the edges | Glued or interlocking |
| Card slit | Holds a business card | Position and orientation |
| Creases | Let the card fold cleanly | Set by the die |
Because everything is cut by one die, the structure has to be settled before the artwork is placed. A die made for a shape is kept on file with the approved artwork, so a reorder of the same folder does not need a new one.
Should the folder have one pocket or two?
Choose by what goes inside. One pocket on the right suits a single set of documents and keeps the left inside panel free for a printed message or contact details. Two pockets suit packs with two kinds of content, for example a brochure and product sheets on one side and a proposal on the other.
Points to consider:
- Pocket depth. The presentation folders page gives a pocket depth of around 90 mm. A deeper pocket holds documents more securely but covers more of each page; a shallower one shows more of the top document.
- Pocket shape. A straight pocket edge is the most common. Angled or curved edges are possible, but they need their own die, so plan them on the standard schedule.
- What shows above the pocket. Decide what readers should see first when they open the folder. If the cover page of a proposal should be visible, check that the pocket does not hide the title.
- Inside print. The inside can be printed in fewer colours than the outside, or left plain. The presentation folders page uses 4C outside and 1C inside as a sample specification.
| Contents | Suggested layout | Why |
|---|---|---|
| A single proposal or report | One pocket, right | Simple, leaves the left panel for a message |
| Brochure plus loose sheets | Two pockets | Keeps the two kinds of content apart |
| Several short documents for different readers | Two pockets, consider a gusset | Separate sets, more total thickness |
| A thick bound document | One pocket with a spine gusset | The gusset lets the folder close flat |
When does a presentation folder need a spine gusset?
A flat folder has a single crease at the spine and suits slim contents. When the documents are thicker, the covers cannot meet and the folder gapes. A gusset is a narrow flat spine, made with two parallel creases, that gives the contents room. The presentation folders page offers 5 mm or 10 mm gussets.
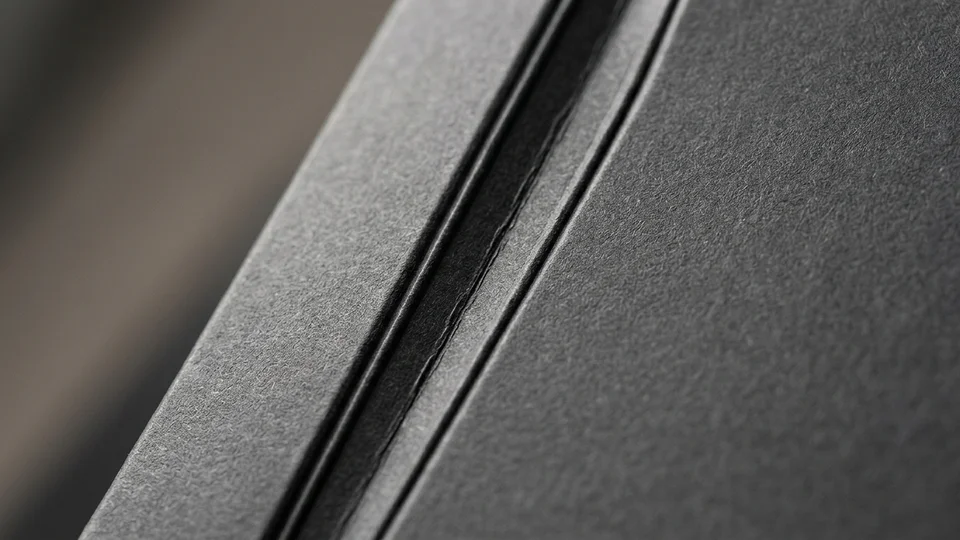
A practical guide from the presentation folders page: if the folder has to hold more than about twenty sheets, ask for a creased gusset at the spine. To decide between 5 mm and 10 mm, estimate the thickness of the contents:
- Count the sheets, not the pages. A 40-page document printed on both sides is 20 sheets.
- Allow for the paper. Thickness depends on the paper’s weight and bulk, so a sheet of 100 gsm uncoated paper is thicker than one of 100 gsm coated paper. Ask for the caliper of the paper you are using if you need a closer figure.
- Add bound documents and inserts. A Wire-O or saddle-stitched document inside the pocket adds its covers and binding to the total.
- Measure a real stack. The simplest check is to stack the actual documents and measure them with a ruler.
If the measured stack is close to the gusset size, choose the larger gusset or ask for advice. A folder that is slightly roomy closes neatly; one that is overfilled bows at the spine.
Glued or interlocking pockets: which should you choose?
Glued pockets are held by flaps fixed with adhesive, so they are firm and stay put under handling. Interlocking pockets are held by a tab that slots into a cut, so they need no glue and can be supplied flat. They hold slightly less than glued pockets and show a slot on the pocket face.
| Glued pockets | Interlocking pockets | |
|---|---|---|
| How they hold | Adhesive flaps | Tab and slot |
| Feel | Firmer | Slightly looser |
| Capacity | Holds a little more | Holds slightly less |
| Supply | Folded and glued | Can be supplied flat |
| Appearance | Clean pocket face | A visible slot on the pocket |
| Production | Includes a gluing step | Skips the gluing step |
Interlocking pockets can suit folders stored flat and assembled when needed. Glued pockets suit folders that will be filled and handed out in quantity, where staff should not have to fold anything first. Either way, the choice is made before the die is drawn.
Where should the business card slit go?
The presentation folders page describes a 55 mm diagonal slit in the right-hand pocket, cut by the same die as the folder. The slit holds a business card by its corners, so the card sits on the pocket face. Plan the slit before placing artwork, because the card will cover part of the pocket design.
Things to check:
- Card size. The usual Singapore name card is 90 × 54 mm, as listed on the name card printing page. If your cards are a different size or orientation, say so, because the slit is drawn for the card.
- Orientation. Decide whether cards sit landscape or portrait, and whether the slit should suit both.
- Clear area. Keep text and logos away from the slit and the area the card covers.
- Pocket only. A slit is normally cut in a pocket, not a cover, so the card is held without cutting through the main design.
If the folder will carry cards from several people, a single slit is still usual; the card is changed for each pack.
How should artwork be laid out on the folder net?
Artwork for a folder is placed on the flat net, not drawn as separate pages. Ask for the template for the chosen folder, keep the die line on its own layer, add 3 mm bleed beyond every outer edge and flap, and keep text clear of creases, the gusset and the card slit. The template shows which way each panel reads.
The main points:
- Use the template. The template shows the covers, pockets, flaps, creases and slit at full size. Place artwork onto it rather than drawing your own outline.
- Separate the die line. Keep cut and crease lines on a separate layer in a named spot colour, so they guide cutting without printing.
- Bleed every edge. Extend background colour 3 mm past every outer edge, including pocket flaps and tabs. Adobe’s guide to setting up print bleed explains the principle and export settings.
- Watch panel orientation. Pockets fold up from the bottom of the net, so a pocket’s printed face can sit upside down on the flat file. Follow the template’s orientation marks.
- Keep clear areas. Keep text off creases and the gusset, where a fold can run through letters, and away from glue flaps, which are hidden when the folder is assembled.
The guide to letterhead, envelope and folder compatibility covers checking the folder against the documents it will carry.
Which card stock and finishes suit a presentation folder?
The presentation folders page lists 300 to 400 gsm matt or gloss art card, with 350 gsm as the usual choice. The card is creased before folding and usually laminated on the outside face so the spine and pocket edges survive handling. Foil, spot UV and blind embossing are available as additional finishes.
- Weight. Below 300 gsm, pockets tend to sag; above 400 gsm, creases resist and the folder can spring open. 350 gsm is the usual middle ground.
- Surface. Matt card gives even colour and suits spot UV on a logo. Gloss card makes photographic covers look stronger. Uncoated card feels natural and takes a pen.
- Lamination. Matt, gloss or soft-touch film on the outside face protects dark designs from scuffs and helps the spine resist cracking.
- Special finishes. Hot foil, spot UV and blind embossing each need their own tooling and an extra production step, so plan them on the standard schedule.
Standard turnaround is 7–14 working days, and the die-cutting, creasing and gluing are included in it.
Worked example: a tender submission folder with a gusset
Hypothetical illustration. Figures are assumptions for explanation, not a real transaction or advice. An engineering consultancy needs 50 folders to hold a printed tender submission and a project director’s name card. The example follows the structural decisions in order: contents, gusset, pockets, card slit, finish and the quote request.
Step 1: Measure the contents. The submission is 80 pages printed double-sided on 100 gsm uncoated paper, so 40 sheets, plus card covers. The coordinator stacks a test print and measures it at a little under 5 mm.
Step 2: Choose the gusset. Forty sheets is well over the twenty or so a flat folder holds comfortably. Because the measured stack is close to 5 mm, the coordinator asks for a 10 mm gusset so the folder closes neatly with the covers included.
Step 3: Choose the pockets. The tender document is one set, so a single glued pocket on the right is enough. The left inside panel will carry the firm’s contact details in one colour.
Step 4: Plan the card slit. A slit in the right pocket for a landscape 90 × 54 mm card. The designer keeps the pocket artwork clear of the slit area.
Step 5: Choose stock and finish. 350 gsm matt art card, matt lamination on the outside face, and a foil logo on the cover, planned on the standard schedule because foil needs its own tooling.
Step 6: Send the brief. The coordinator sends the quote request with the quantity, gusset size, pocket and slit details, stock, finish, artwork on the supplied template and the required date. Artwork, stock and capacity are confirmed in the quotation, and timing is agreed when the job is confirmed. Tender rules on binding and presentation come from the tender document; the guide to GeBIZ tender document printing covers the printing side.
Frequently Asked Questions
How many sheets will a flat presentation folder hold?
A flat folder on 350 gsm card holds about twenty sheets comfortably. Beyond that, ask for a creased gusset of 5 mm or 10 mm at the spine so the folder closes over the document instead of gaping. Give the page count and paper weight so the capacity can be checked.
Should a folder have one pocket or two?
One pocket on the right suits a single document set and leaves the left inside panel free for a message or contact details. Two pockets suit packs with two kinds of content, such as a brochure on the left and a proposal on the right.
What is the difference between glued and interlocking pockets?
Glued pockets are fixed with adhesive flaps and feel firmer. Interlocking pockets hold with a tab and slot, need no glue and can be supplied flat, but they hold slightly less and show a slot on the pocket face.
Where does the business card slit go?
Usually in the right-hand pocket, cut by the same die as the folder. Keep text and important artwork clear of the slit area, because the card will cover it, and check the slit against a 90 × 54 mm card.
What should a presentation folder brief include?
A presentation folder brief should state the size, the number of pockets and their glued or interlocking construction, whether a spine gusset is needed and how thick the contents are, the card slit position, the stock and finishes, the quantity and the required date. With those fixed, the die can be drawn once and kept for reorders.
- Folder size, or the standard A4 format.
- One pocket or two, and glued or interlocking.
- Contents measured, and a 5 mm or 10 mm gusset if needed.
- Card slit position and card orientation.
- Stock, lamination and any foil, spot UV or embossing.
- Artwork on the folder template with the die line on its own layer and 3 mm bleed.
- Quantity and required date.
Same-day and urgent printing available. Subject to artwork approval, payment, print type and production availability. Timing confirmed per job. To start, send your brief through the request a quote page.
Same-day and urgent printing available. Subject to artwork approval, payment, print type and production availability. Timing confirmed per job.