
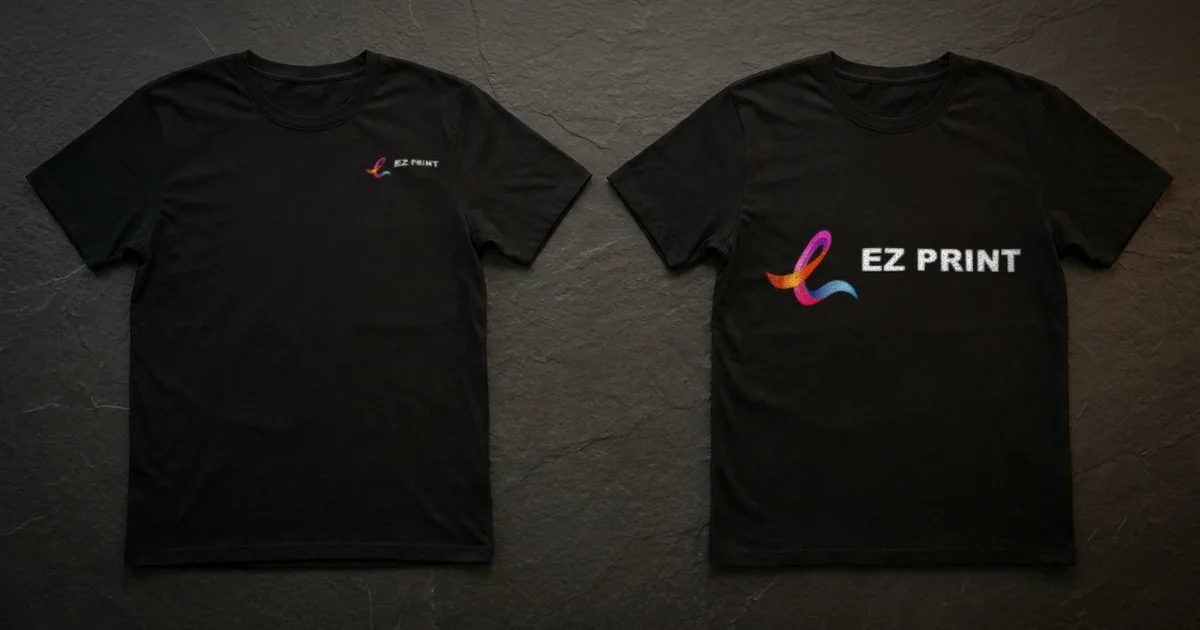
A t-shirt print in Singapore sits in one of four standard positions: the left chest at about 90 mm wide, the front or the back at up to about 280 × 380 mm, or a sleeve at about 80 × 80 mm. Each extra position is a separate pass over every garment, so the positions are chosen deliberately and every print size is stated in millimetres.
This guide covers where each print goes, how big it should be and how to set up the artwork per position. Choosing the decoration method itself is covered in the t-shirt printing method comparison, and collecting names, sizes and quantities from a team is covered in the team apparel brief.
What are the standard t-shirt print positions and sizes?
There are four standard print positions: front, back, left chest and sleeve. The left chest is about 90 mm wide, the front and the back run up to about 280 × 380 mm, and a sleeve mark is about 80 × 80 mm. These are working maximums, the sizes that sit correctly on a body rather than the largest that will physically fit.
| Position | Working size | What it is for | What to watch |
|---|---|---|---|
| Left chest | About 90 mm wide | The standard corporate position, embroidery or a small print | Small type has to stay readable at this width |
| Front | Up to about 280 × 380 mm | The main event position | Keep it clear of the collar seam and the hem |
| Back | Up to about 280 × 380 mm | Sponsors and staff roles | A second pass over every garment |
| Sleeve | About 80 × 80 mm | A small mark | A further pass, worth it only when it earns its place |
A print on a garment is a position rather than a trim. On paper, a size is cut to a line; on a shirt, the print sits on a curved, stretchy, moving surface, and the same 250 mm front print sits differently on a small and an extra-large body. That is why the sizes above are stated as “about” and “up to”, and why the measurements belong in the brief as figures rather than as a rectangle drawn on a mockup.
Two practical consequences follow. First, a front print sized to the largest working maximum is not automatically the right choice: a design that fills the front of a large shirt can crowd the collar seam or the hem on a smaller one, so the size is chosen for the range of bodies in the order. Second, the honest check before a full run is a single sample garment, which is one reason direct-to-film and direct-to-garment both have a minimum of one.
Why is each extra print position a separate pass?
Every extra print position is a separate pass over every garment. A front, a back and a left chest is three passes on eighty shirts, not one job with three pictures. The shirt is positioned again for each print area, and every decoration method needs a curing or pressing pass after the ink or the thread goes on.
This is the most common misunderstanding in an apparel order. A sheet of paper can carry several images printed at once, so it is natural to assume a shirt with three logos is one job. It is not. Each position means handling every garment again:
- Front and back are two passes. The garment is laid out for the front, decorated, finished, and then laid out again for the back. The back is described on the apparel service page as “a second pass”, and that is literal.
- The left chest is a pass of its own. A logo on the chest and a large graphic on the front are two separate operations, even though both sit on the same face of the shirt.
- A sleeve is a further pass. It is a small mark on a different part of the garment, so it is added only when it does a clear job, such as carrying a sponsor that cannot sit anywhere else.
- Every method is finished. Every method needs a curing or pressing pass after the ink or the thread goes on, so the decoration is not complete when the print is laid down.
All of this is planned inside the standard window. Standard turnaround is 7–14 working days for every method and every garment, including sourcing the garments in the sizes ordered. Each additional print position is part of that schedule rather than a reason to change it, which is why the full list of positions belongs in the first enquiry rather than being added after the artwork is approved.
How should the artwork be set up for each print position?
Prepare one artwork file per position, stated in millimetres at the finished size. Supply vector artwork in Illustrator or PDF with all fonts outlined, or a 300 dpi raster for transfers and direct-to-garment. A screen needs separated flat colours, an embroidery file is digitised into stitches, and a transfer needs full colour with a clean edge.
One logo file rarely serves every position or every method, so the set-up is done per position:
| Artwork item | What the position needs |
|---|---|
| Print size | Stated in millimetres at the finished size, per position |
| File format | Vector, Illustrator or PDF, with all fonts outlined; 300 dpi raster for transfers and direct-to-garment |
| Silkscreen | One layer per colour, flat solids, no gradients, nothing under 1 pt |
| Embroidery | Vector supplied, then digitised into stitches; the digitised file is kept for reorders |
| Transfer | Full colour at final size with a clean cut edge and no soft drop shadows |
| Colour mode | Named Pantone references for screen and thread; CMYK for transfers and direct-to-garment |
The small positions are where artwork usually fails. Minimum type printed on cotton is 10 pt, and an embroidered letter needs to be about 5 mm tall. A tagline that reads comfortably under a logo on a letterhead can drop below those limits once the whole logo is scaled to about 90 mm wide for the left chest, or to about 80 × 80 mm for a sleeve. Check the smallest type at the finished size of each position, not on screen at whatever zoom the file happens to open at.
Large positions fail differently. A front or back print at up to about 280 × 380 mm is big enough to show every weakness in a low-resolution image, so a full-colour design for a transfer or direct-to-garment print needs to be 300 dpi at that finished size, not at the size it was first drawn. If the same design is wanted on the front and as a small mark on the chest, supply two files, each built for its own size.
What changes when the shirt is dark?
On any dark garment, a white layer is printed first. Ink on cloth is translucent, so without that underbase a red logo on a black shirt reads as brown. The underbase is not drawn by you: it is generated from your artwork for the dark garments in the order, under every position that carries colour.
For placement, the practical point is simple. Say the garment colour with the positions, because a dark shirt means an underbase under the front, the back, the chest and the sleeve alike. The reasons, and how each decoration method handles dark cloth, are covered in the t-shirt printing method comparison.
What should a print placement brief state?
A placement brief states the garment, its fabric and colour, every print position, the size of each print in millimetres, the number of colours in each, and the size breakdown. The decoration method is then recommended against the fabric and the artwork, and a single sample garment can be run before the full order.
Use this list before sending artwork:
- Garment, fabric and colour. Cotton and cotton-blend t-shirts, dri-fit polyester polos and woven corporate shirts each take decoration differently, so name the garment first.
- Every print position. Front, back, left chest, sleeve. Count them: each additional position is a separate pass over every garment.
- The size of each print. Left chest about 90 mm wide; front and back up to about 280 × 380 mm; sleeve about 80 × 80 mm. State each in millimetres at the finished size.
- Colours per position. A silkscreen needs one screen per colour, so a three-colour chest logo and a one-colour back print are specified separately.
- The size breakdown. Garments are ordered as stock in the sizes requested, so the breakdown is the most common cause of delay. Send it with the enquiry.
- Timing. Standard turnaround is 7–14 working days. Express is quoted per job. Same-day and urgent printing available. Subject to artwork approval, payment, print type and production availability. Timing confirmed per job.
Worked example: Planning front, back and sleeve prints for staff event shirts
Hypothetical illustration. Figures are assumptions for explanation, not a real transaction or advice. A company wants 80 dark cotton staff shirts for an event, with an event mark on the front, staff roles on the back, a logo on the chest and a sponsor on the sleeve. Planning each position separately shows what each one adds before artwork is finalised.
- Step 1: List the positions. Front, back, left chest and sleeve is four positions, which means four passes over each of the 80 shirts.
- Step 2: Question the overlap. The chest logo and the front event mark sit on the same face. The team decides the event mark already carries the company name, so the chest logo is dropped. That removes a pass without losing anything visible.
- Step 3: Keep the sleeve only if it earns it. The sponsor needs to be seen and the back is reserved for staff roles, so the sleeve mark stays at about 80 × 80 mm.
- Step 4: Size each print. The front event mark is drawn at about 250 × 300 mm, inside the front maximum and clear of the collar seam and the hem. The back staff role is set within the back maximum of about 280 × 380 mm.
- Step 5: Check the small type. The sponsor’s tagline is too small to read at sleeve size, so the sleeve carries the sponsor’s mark alone.
- Step 6: Note the dark garment. The shirts are dark, so a white underbase is generated under all three positions.
- Step 7: Sample, then run. One sample garment is checked before the full order, and the job runs inside the standard turnaround of 7–14 working days.
Where does EZ Print fit in a t-shirt order?
EZ Print produces custom apparel in Singapore and has done since 2017, using silkscreen, direct-to-film transfer, direct-to-garment and embroidery on cotton and cotton-blend t-shirts, dri-fit polyester polos and woven corporate shirts. Garments are supplied in the sizes and colours ordered, and the method is chosen from the fabric and the artwork.
The custom apparel printing service sets out the positions, print sizes and artwork rules in full. For matching branded items beyond garments, see corporate gift printing. Send the garment, positions, print sizes and size breakdown through request a quote and every job is quoted from its specification.
Frequently asked questions about t-shirt print placement and sizing in Singapore
What size is a left chest logo on a t-shirt?
About 90 mm wide. Left chest is the standard corporate position and takes either embroidery or a small print, so the logo has to read clearly at that width.
How big can a front or back t-shirt print be?
Up to about 280 × 380 mm for both the front and the back. Those are working maximums that sit correctly on a body, and a front print should stay clear of the collar seam and the hem.
How big is a sleeve print?
About 80 × 80 mm. A sleeve mark is a small mark and a further pass over every garment, so it is worth adding only when it has a clear job to do.
Does each extra print position add work?
Yes. Every extra print position is a separate pass over every garment. A front, a back and a left chest is three passes on eighty shirts, not one job with three pictures.
What artwork is needed for each print position?
Vector artwork in Illustrator or PDF with all fonts outlined, or a 300 dpi raster for transfers and direct-to-garment, with the print size stated in millimetres at the finished size for each position.
Same-day and urgent printing available. Subject to artwork approval, payment, print type and production availability. Timing confirmed per job.